
Setting Up Your Mac Pro
Your Mac Pro is designed so that you can set it up quickly and start using it right away.
Follow the steps on the next few pages to get started.
Step 1:
Position your Mac Pro.
Pick up your Mac Pro by both of its handles using correct lifting techniques. Position
your Mac Pro so that:
Â
It is on a sturdy, flat surface
Â
The power cable connectors don’t press against a wall or other object
Â
The airflow in front of, behind, and below your Mac Pro is not obstructed
Â
The computer’s optical drive trays have space to open in front
The only way to shut off power completely to your Mac Pro is to disconnect the power
plugs from the power source. Make sure the power cord for your Mac Pro is within easy
reach so that you can unplug it.
10
Chapter 1
Ready, Set Up, Go
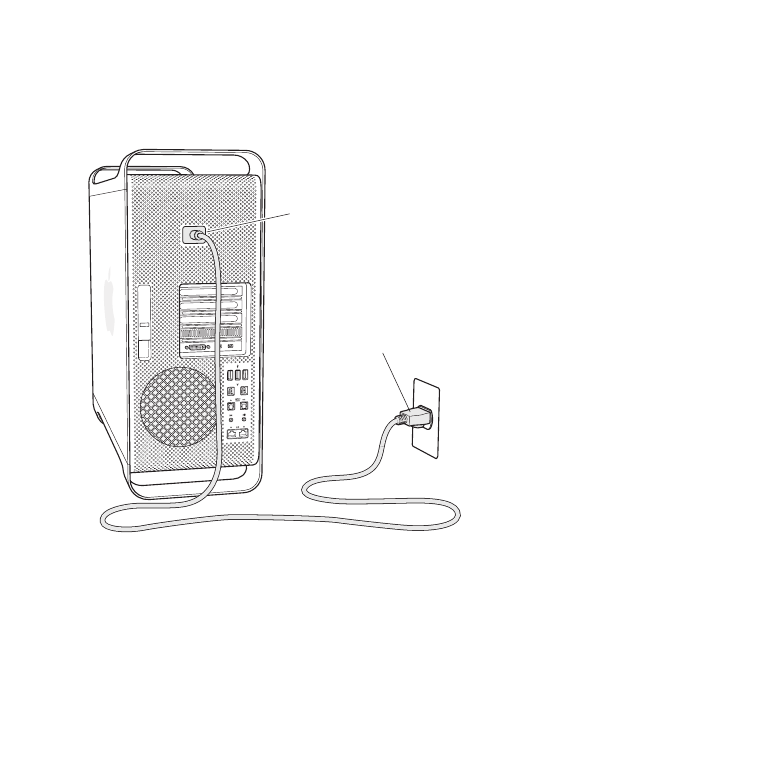
Step 2:
Plug in the power cord.
Plug the power cord completely into the recessed power cord socket on the back of
your Mac Pro and plug the other end into a grounded power outlet.
Power cord socket
Power cord plug
11
Chapter 1
Ready, Set Up, Go
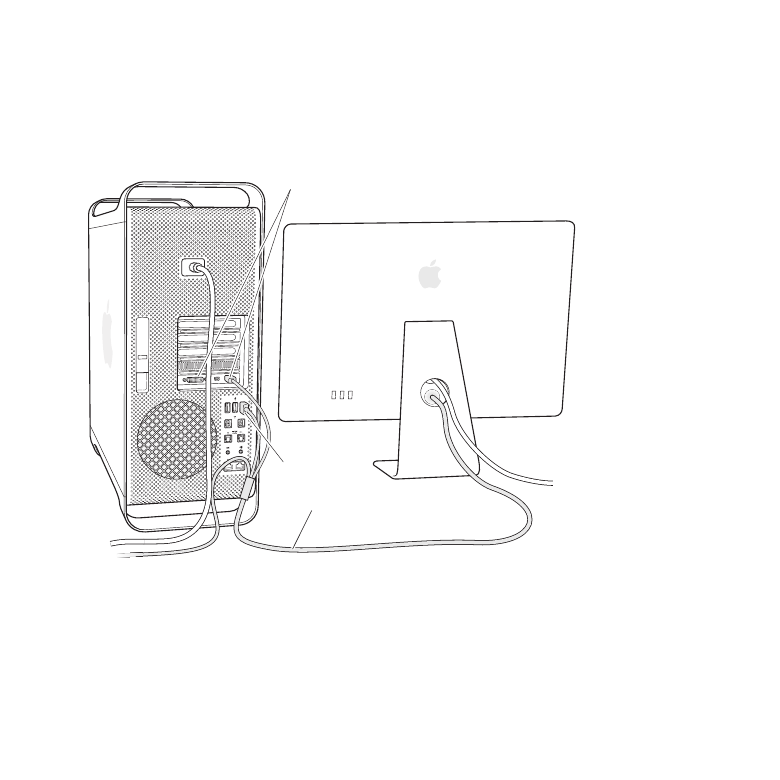
Step 3:
Connect a display.
If you are connecting a display to your Mac Pro, connect it as shown below. Depending
on the display, you may have one or more cables to connect. Check the instructions
that came with the display for additional setup information.
Display cable
Display ports
USB port
12
Chapter 1
Ready, Set Up, Go
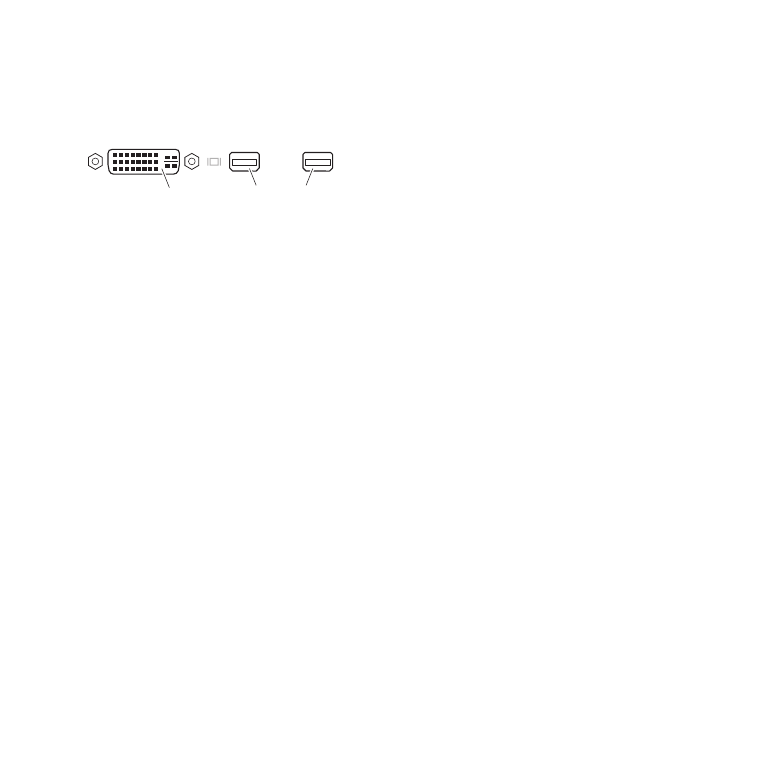
You can connect up to three displays with Mini DisplayPort or Digital Visual Interface
(DVI) connectors to the display ports on the back of your Mac Pro. The DVI display port
is a dual-link port, so you can connect a 30-inch Apple Cinema HD Display.
DVI display port
Mini DisplayPort (2)
You can also connect displays that have an Apple Display Connector (ADC) or a video
graphics array (VGA) connector using one of the following adapters:
Â
To connect a VGA display to the DVI display port or a Mini DisplayPort, use the
Apple DVI to VGA Display Adapter or the Apple Mini DisplayPort to VGA Adapter
(both available separately).
Â
To connect an ADC display to the DVI display port, use an Apple DVI to ADC Display
Adapter (available separately).
The Mini DisplayPort outputs provide both video and audio output. You must use the
Sound panel in System Preferences to select the connected device for audio output. For
more information about connecting an HDMI device, search for “HDMI” on the Mac Pro
Support page at www.apple.com/support/macpro.
Display adapters and other accessories for your Mac Pro are sold separately at
www.apple.com/store.
13
Chapter 1
Ready, Set Up, Go
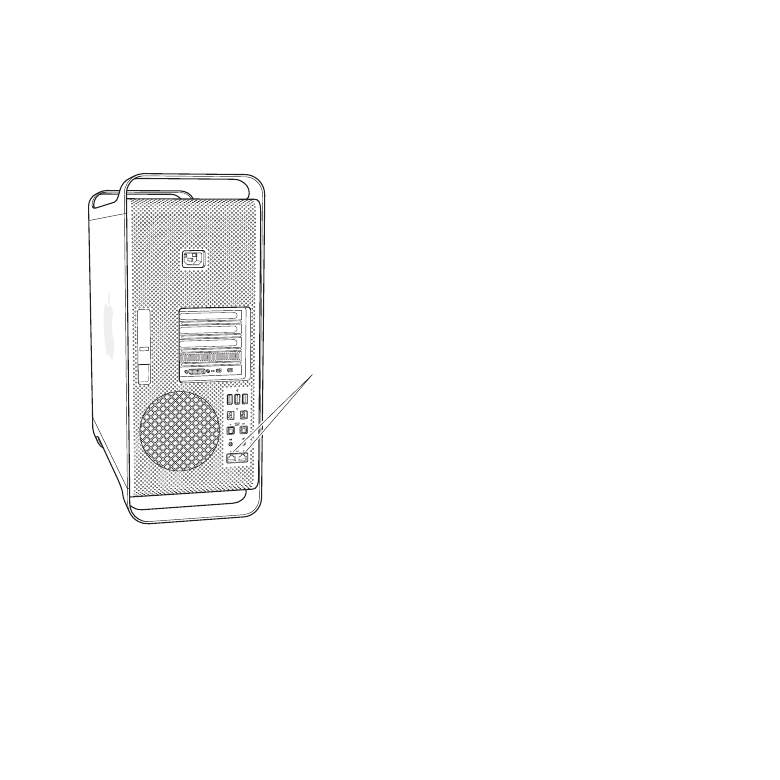
Step 4:
Connect an Ethernet cable.
To access the Internet or a network using an Ethernet cable, connect one end of an
Ethernet cable to either of the Gigabit Ethernet ports on the back of your Mac Pro.
Connect the other end to a cable modem, DSL modem, or Ethernet network.
Gigabit Ethernet ports
14
Chapter 1
Ready, Set Up, Go
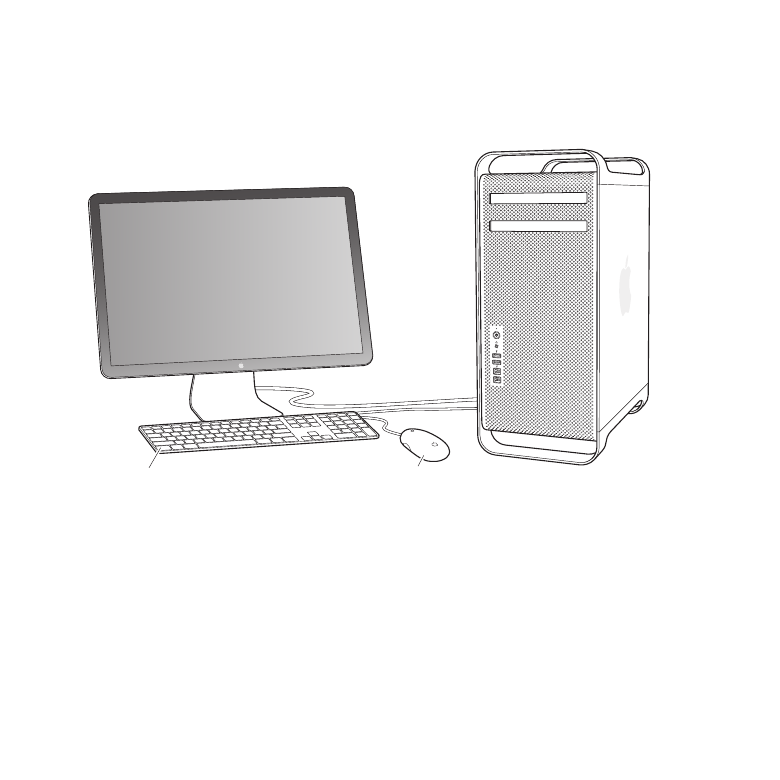
Step 5:
Connect a keyboard and mouse.
If you are connecting a USB keyboard and mouse, connect the USB cables to the USB
ports (d) on your Mac Pro or on a display.
Mouse
Keyboard
Note: You can set Mac OS X Lion Server up remotely from another computer. For
information, open the Server application on the other computer and choose Server
Help from the Help menu.

15
Chapter 1
Ready, Set Up, Go
Step 6:
Turn on your Mac Pro.
Press the power button (®) on the front of your Mac Pro to turn it on. If you have a
display that must be turned on separately, turn it on by pressing its power button. If
you connected a mouse, click your mouse to establish a connection with your Mac Pro.
Step 7:
Configure your Mac Pro server with Server Assistant.
The first time you turn on your Mac Pro with Mac OS X Lion Server installed, Server
Assistant asks for some basic information that Lion Server needs in order to start up
and connect to the network. Be ready to provide the following information the first
time you turn on your Mac Pro:
Â
An account name and password.
Â
An organizational name that’s unique in your company.
Â
A host name, which can be for your local network only, for your local network and
VPN access from the Internet, or an Internet host name you purchased from a domain
name registrar.
Â
Detailed network settings, including IP address, subnet mask, and DNS servers. The
network settings may be provided by your Internet router or a server on your network.
If so, it should be configured to provide your server the same IP address all the time
(static mapping or DHCP reservation).
For help with Server Assistant, click the Help button in any pane.
You can set up Mac OS X Lion Server remotely from another computer. For information,
open the Server application on the other computer and choose Server Help from the
Help menu.
To learn more about Mac OS X Lion Server software, see the Lion Server website at
www.apple.com/macosx/server.

16
Chapter 1
Ready, Set Up, Go
If you already have a Mac with Mac OS X Server version 10.5 or later, Server Assistant
can help you automatically transfer system settings, service settings, user accounts, files,
applications, and other information from your previous Mac server (any model) to your
Mac Pro. Use an Ethernet, FireWire, or wireless connection to transfer information.
For information about working with the services in Mac OS X Lion Server, open the
Server application and choose Server Help in the Help menu.