
Installing Memory
Your Mac Pro comes with a minimum of 8 GB of memory in the single-processor model
installed as 2 GB unbuffered ECC dual inline memory modules (UDIMMs).
All installed UDIMMs must meet these specifications:
Â
PC3-10600E, 1333 MHz, DDR3 SDRAM UDIMMs
Â
Error-correcting code (ECC)
Â
72-bit wide, 240-pin ECC modules
Â
36 ICs maximum per ECC UDIMM
NOTICE:
Apple recommends that you use Apple-approved DIMMs. DIMMs from older
Mac computers cannot be used in your Mac Pro. You can purchase Apple-branded
memory online from the Apple Store at www.apple.com/store.
When purchasing DIMMs for use in Mac computers, make sure that the memory vendor
conforms to the Joint Electron Device Engineering Council (JEDEC) specification. Check
with your memory vendor to ensure that the DIMMs support the correct timing modes
and that the Serial Presence Detect (SPD) feature has been programmed properly, as
described in the JEDEC specification.
Note: Although the memory speed of the UDIMMS is 1333 MHz, they will operate at
1066 MHz or 1333 MHz, depending on the processor in the computer.
38
Chapter 3
Making a Good Thing Better
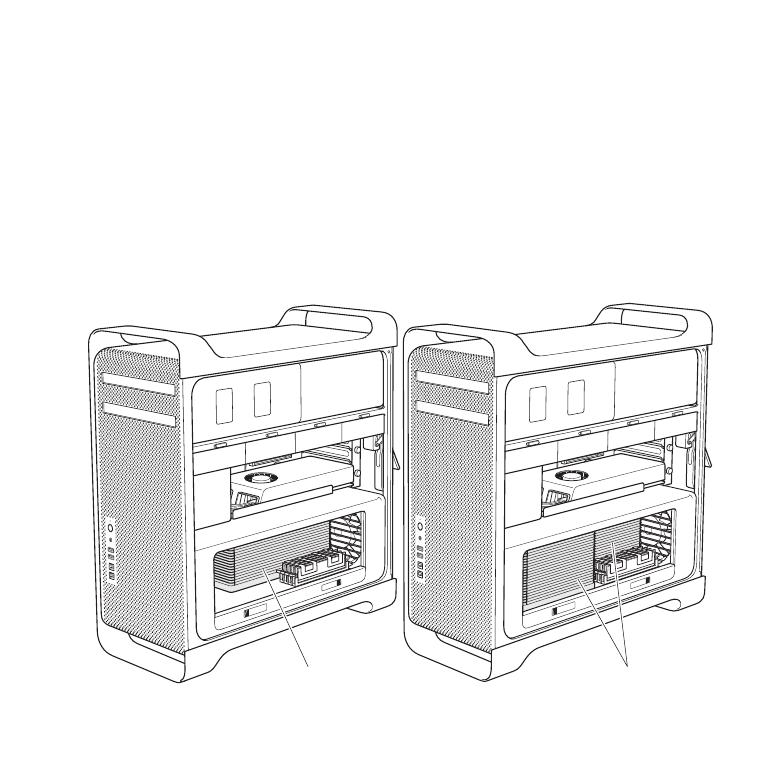
Before you install memory, determine whether you have a single- or dual-processor
Mac Pro. Remove the side panel, following the instructions in “Opening Your Mac Pro”
on page 33, and look inside:
Â
A quad-core or 6-core Mac Pro has one processor and four memory slots. You can
install a total of up to 16 GB of memory. See “Installing Memory in a Quad-Core or
6-Core Mac Pro” on page 39.
Â
An 8-core or 12-core Mac Pro has two processors and eight memory slots. You can
install a total of up to 32 GB of memory. See “Installing Memory in an 8-Core or
12-Core Mac Pro” on page 48.
One processor
Two processors

39
Chapter 3
Making a Good Thing Better
You can also determine which Mac Pro you have by choosing Apple () > About This
Mac from the menu bar. Click More Info, choose Hardware from the Contents list, and
then find Number Of Processors in Hardware Overview. The quad-core and 6-core
Mac Pro have one processor and the 8-core and 12-core Mac Pro have two processors.
Installing Memory in a Quad-Core or 6-Core Mac Pro
The quad-core and 6-core Mac Pro have four memory slots, and come with at least four
2 GB DIMMs installed. You can replace or install additional 1 GB, 2 GB, or 4GB DIMMs for
a total of up to 16 GB of memory.
It’s important that all DIMMs installed in your Mac Pro are of the correct specifications.
Use the instructions that follow to install DIMMs in a quad-core or 6-core Mac Pro.
To install memory:
1
Shut down your Mac Pro, open it, and remove the side panel, following the instructions
in “Opening Your Mac Pro” on page 33.
WARNING:
Let your Mac Pro cool down for 5 to 10 minutes before you remove the
processor tray or touch the internal components. The processor tray and components
may be very hot.

40
Chapter 3
Making a Good Thing Better
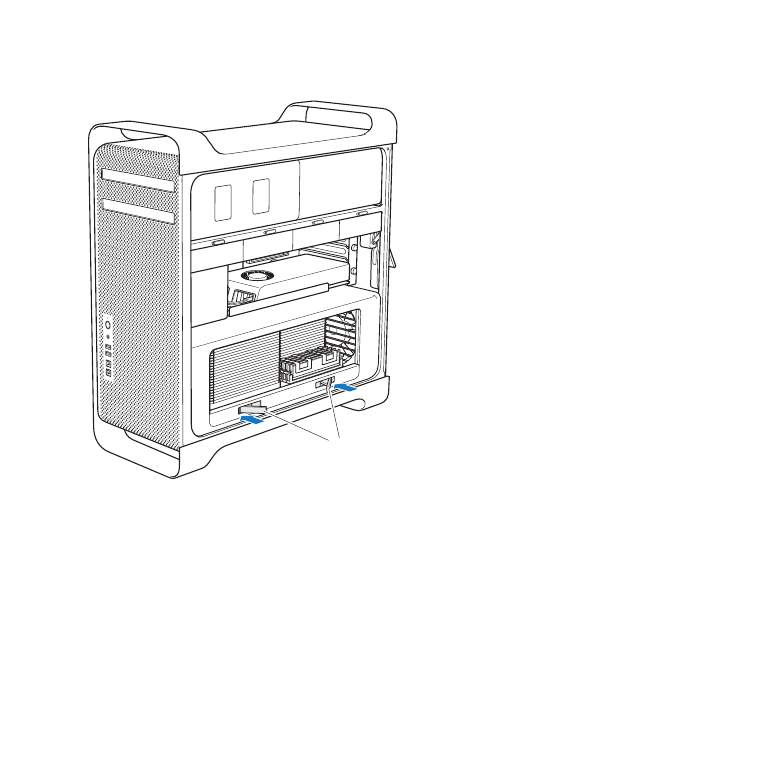
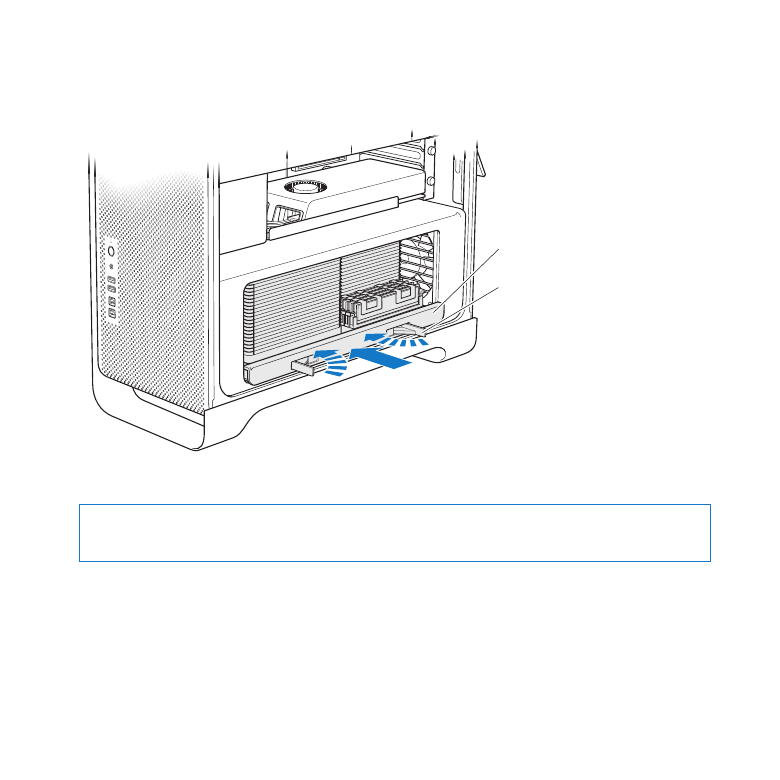
2
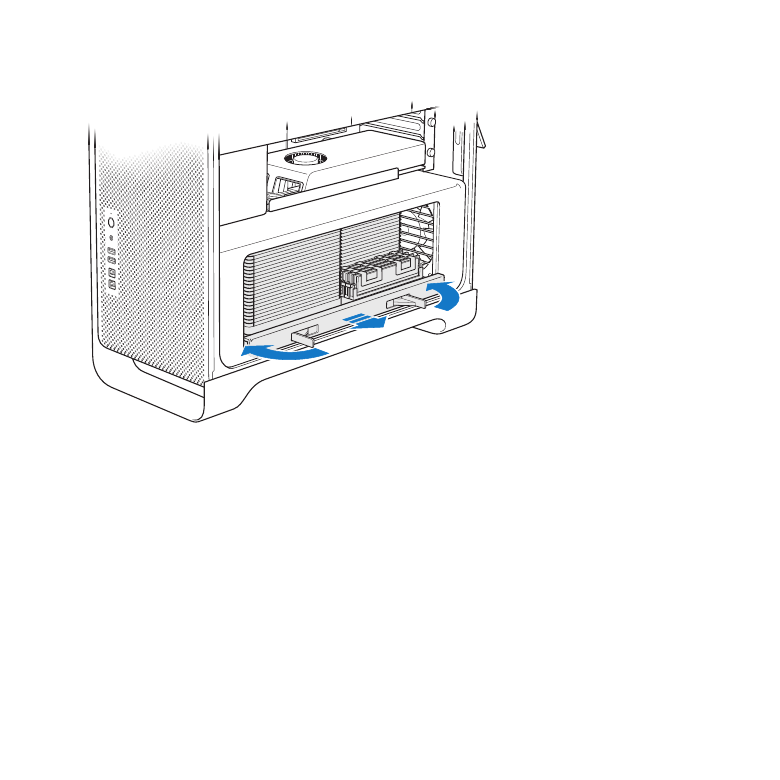
Push the latches on the processor tray until they partially open.
Latches
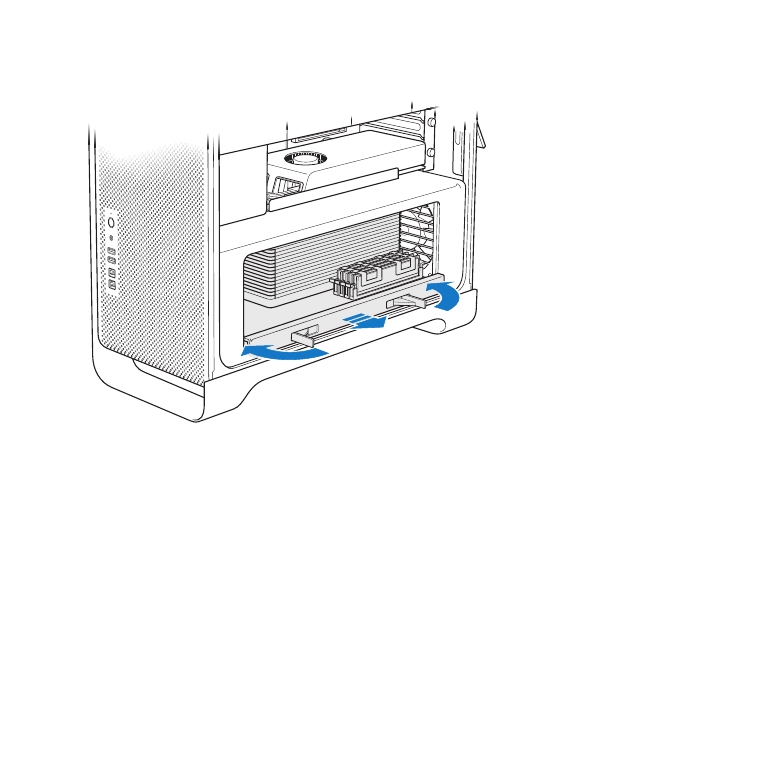
41
Chapter 3
Making a Good Thing Better
3
Pull the latches until they open all the way and release the processor tray.
42
Chapter 3
Making a Good Thing Better
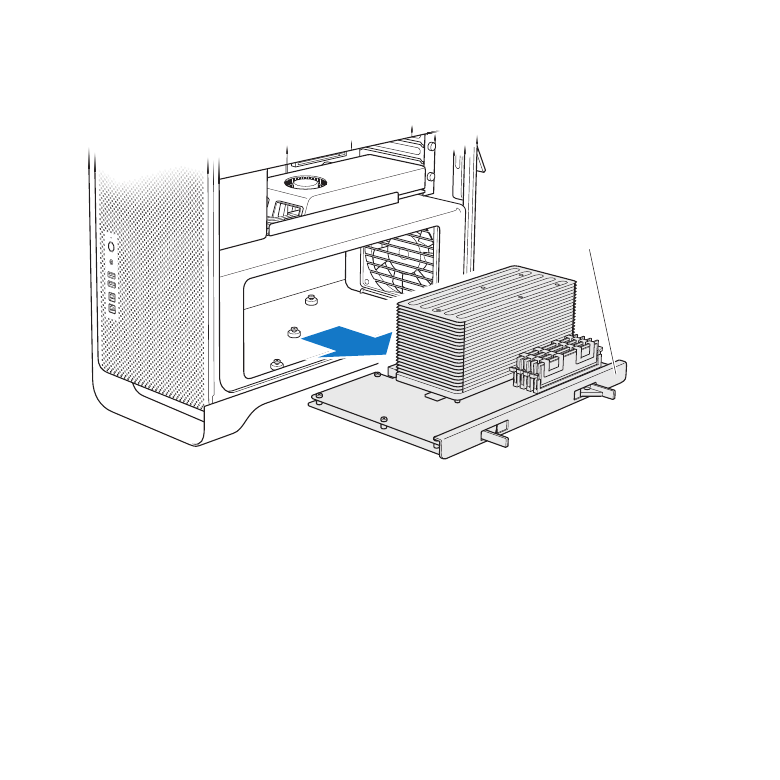
4
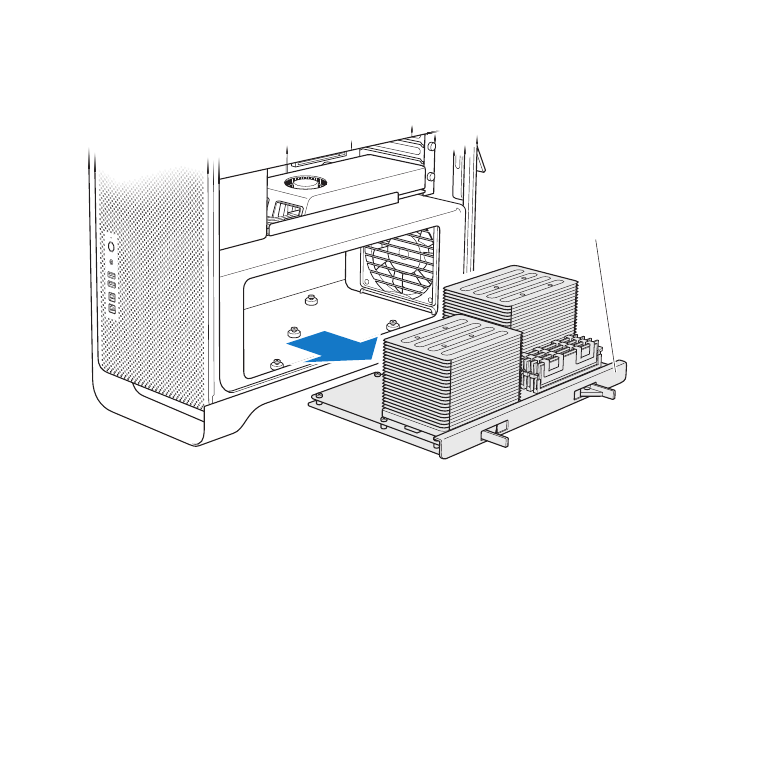
Remove the processor tray and lay it on a soft, clean cloth on the desk or work surface,
to protect the tray and avoid scratching the work surface.
Processor tray
43
Chapter 3
Making a Good Thing Better
If you install equal-size DIMMs (for example, all 1 GB DIMMS or all 2 GB DIMMS) in your
quad-core or 6-core Mac Pro, Apple recommends that you fill the slots in the order
listed in the table.
Slot 4
Slot 3
Slot 2
Slot 1
If you have
Fill these slots
Two DIMMs
1 and 2
Three DIMMs
1, 2, and 3
Four DIMMs
1, 2, 3, and 4 (all)
Note: If you install different-size DIMMs in your Mac Pro, follow the order in the table.
If the DIMM configuration you install doesn’t provide optimized performance, the
Memory Slot Utility appears onscreen and recommends an improved configuration.
To use the utility again, go to /System/Library/CoreServices/Memory Slot Utility.

44
Chapter 3
Making a Good Thing Better
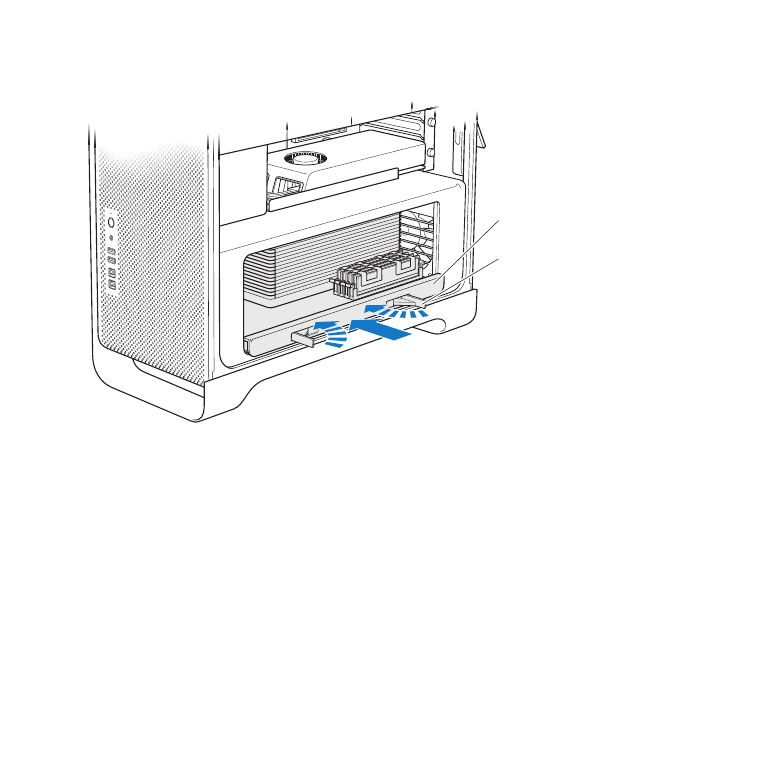
5
Open the ejectors on DIMM slots 1, 2, and 3 and push them out to the sides. Then
remove the DIMMs from the slots.
6
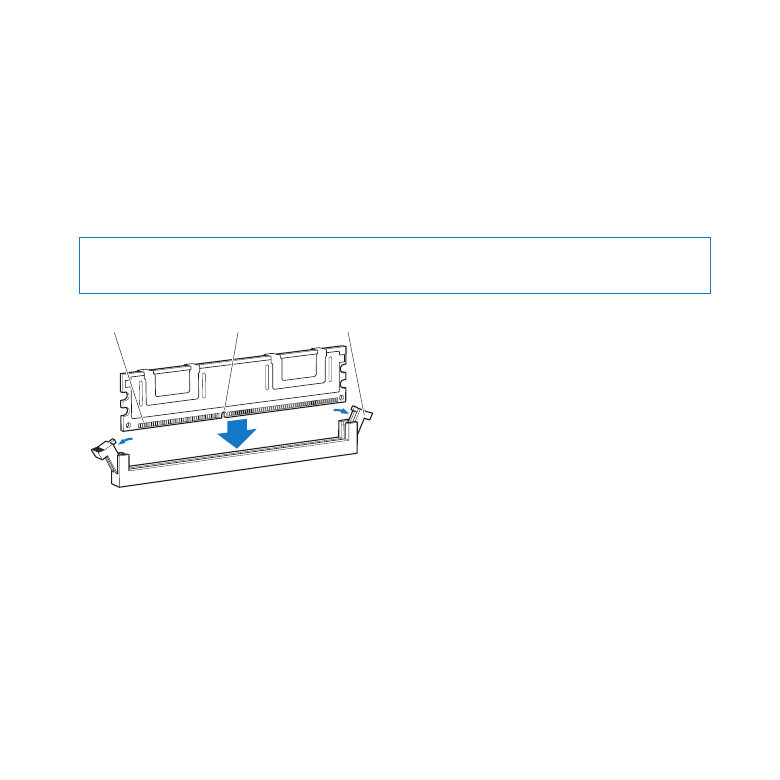
Install the DIMMs by aligning them in the DIMM slots and pushing both ends of the
DIMM down until the tabs are vertical and the ejectors snap into place.
NOTICE:
To avoid damaging the DIMM, hold it by the corners and don’t touch the
gold connectors or other components.
Ejectors
Notch
Connectors
45
Chapter 3
Making a Good Thing Better
7
Reinstall the processor tray, pushing it in until the latches are at a 90-degree angle.
Processor tray
Latch
8
Push the latches all the way in to close them and seat the processor tray.
46
Chapter 3
Making a Good Thing Better
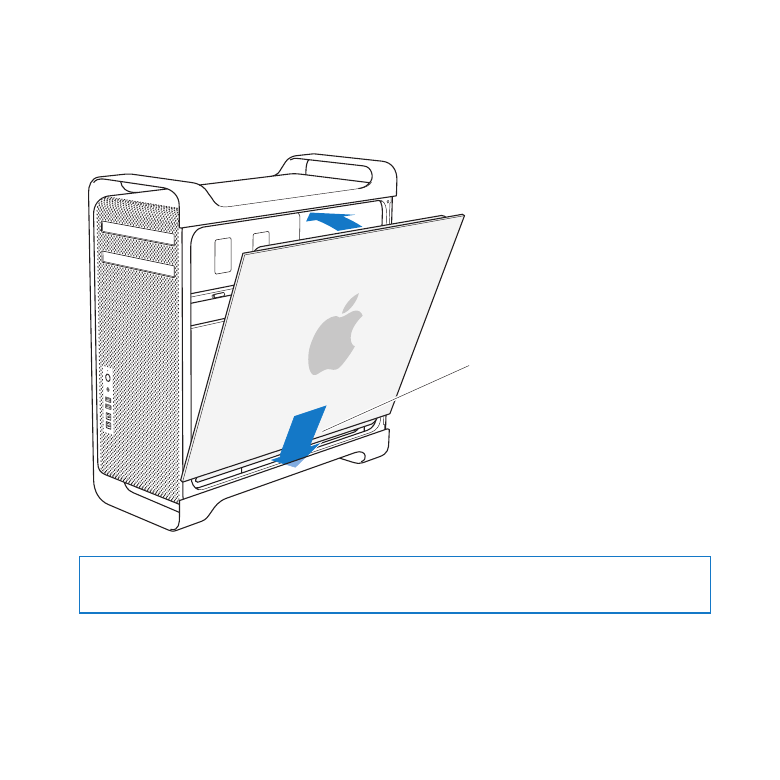
9
Replace the side panel.
When you replace the side panel, make sure the latch is up. Hold the side panel
securely so it stays in place as you push the latch down.
Place the side panel
in the slot and then
push to close.
NOTICE:
Always replace the side panel after installing components. Your Mac Pro
doesn’t operate properly without the side panel in place.
47
Chapter 3
Making a Good Thing Better
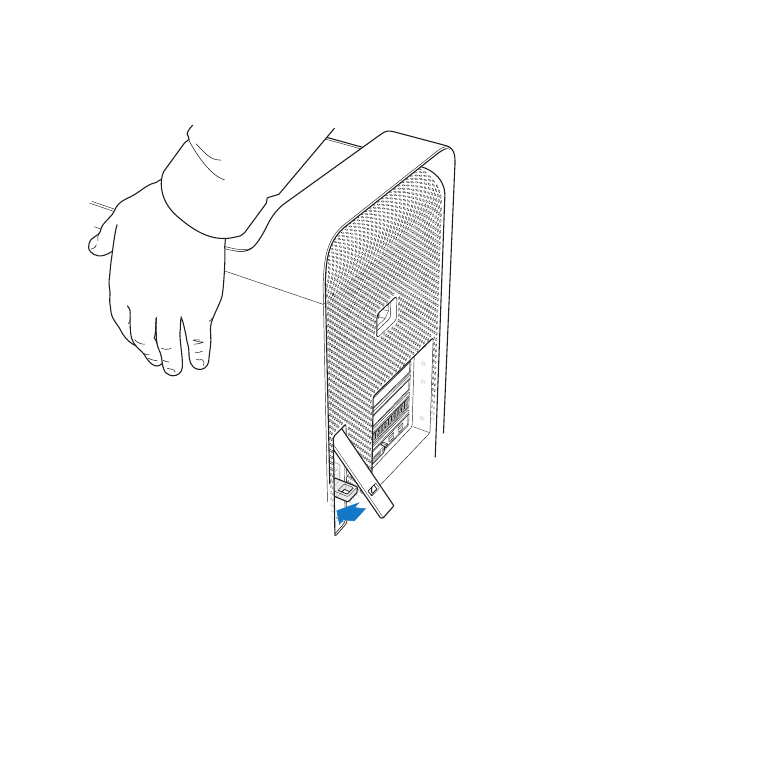
10
Hold the side panel against your Mac Pro and push the latch down to secure the
side panel.
You can attach a lock or cable through a metal loop (under the latch) to secure your
Mac Pro. Flip the metal loop down before you close the latch, then close the latch and
attach your lock or cable through the extended loop.

48
Chapter 3
Making a Good Thing Better
Installing Memory in an 8-Core or 12-Core Mac Pro
The 8-core and 12-core Mac Pro have eight memory slots, and, in most configurations,
come with at least four 2 GB DIMMs installed. You can install a total of up to 32 GB
of memory.
It’s important that all the DIMMs installed in your Mac Pro have the correct specifications.
Use the instructions that follow to install DIMMs in an 8-core or 12-core Mac Pro.
To install memory in a dual-processor Mac Pro:
1
Shut down your Mac Pro, open it, and remove the side panel, following the instructions
in “Opening Your Mac Pro” on page 33.
WARNING:
Let your Mac Pro cool down for 5 to 10 minutes before you remove the
processor tray or touch the internal components. The processor tray and components
may be very hot.
49
Chapter 3
Making a Good Thing Better
2
Push the latches on the processor tray until they open slightly.
Latches
50
Chapter 3
Making a Good Thing Better
3
Pull the latches until they open all the way and release the processor tray.
51
Chapter 3
Making a Good Thing Better
4
Remove the processor tray and lay it on a soft, clean cloth on the desk or work surface,
to protect the tray and avoid scratching the work surface.
Processor tray
52
Chapter 3
Making a Good Thing Better
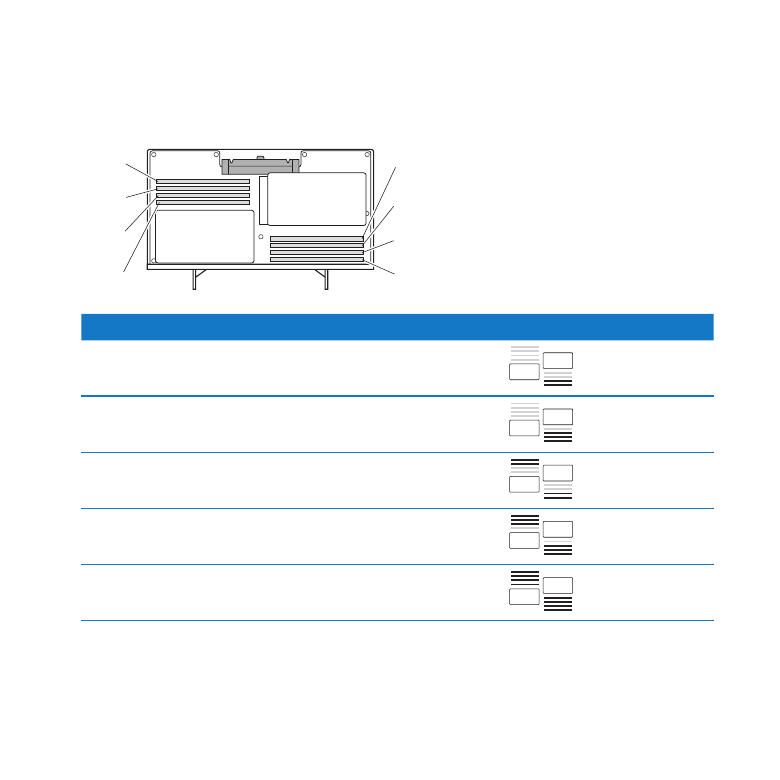
If you install equal-size DIMMs (for example, all 1 GB DIMMS or all 2 GB DIMMS) in your
8-core or 12-core Mac Pro, Apple recommends that you fill the slots in the order listed
in the table.
Slot 4
Slot 3
Slot 2
Slot 1
Slot 5
Slot 6
Slot 7
Slot 8
If you have
Fill these slots
Two DIMMs
1 and 2
Three DIMMs
1, 2, and 3
Four DIMMs
1, 2, and 5, 6
Six DIMMs
1, 2, 3, and 5, 6, 7
Eight DIMMs
1, 2, 3, 4, and 5, 6, 7, 8 (all)
53
Chapter 3
Making a Good Thing Better
Note: If you install different-size DIMMs in your Mac Pro, follow the order in the table.
If the DIMM configuration you install doesn’t provide optimized performance, the
Memory Slot Utility appears onscreen and recommends a better configuration.
To use the utility again, go to /System/Library/CoreServices/Memory Slot Utility.
5
Install the DIMMs by aligning them in the DIMM slots and pushing both ends of the
DIMM down until the tabs are vertical and the ejectors snap into place.
NOTICE:
To avoid damaging the DIMM, hold it by the corners and don’t touch the
gold connectors or other components.
Ejectors
Notch
Connectors
54
Chapter 3
Making a Good Thing Better
6
Reinstall the processor tray, pushing it in until the latches are at a 90-degree angle.
7
Push the latches all the way in to close them and seat the processor tray.
Processor tray
Latch
8
Replace the side panel, following the instructions starting on page 46.
NOTICE:
Always replace the side panel after installing components. Your Mac Pro
doesn’t operate properly without the side panel in place.

55
Chapter 3
Making a Good Thing Better