
Installing Internal Storage Devices
Your Mac Pro has room for six internal drives: two optical drives, and four hard disk or
solid state drives. In most configurations, a single drive occupies the first drive bay and
an optical drive is located in the upper optical drive bay.
You can add up to three 3.5-inch cable-free Serial ATA (SATA) hard disk drives to the
empty drive bays. The drives must meet these specifications:
Â
Type: SATA 3 Gb/s
Â
Width: 3.9 inches (102 mm)
Â
Depth: 5.7 inches (147 mm)
Â
Height: 1.0 inch (25.4 mm)
You can add up to three 2.5-inch solid state disk drives (SSDs) to the empty drive bays.
The drives must meet these specifications:
Â
Type: SATA 3 Gb/s
Â
Width: 2.5 inches (63.5 mm)
The solid state drives (SSD) come with adapters that fit the 3.5-inch drive bays.
For more information about requirements or supported devices, visit an Apple
Authorized Reseller, the Apple Store at www.apple.com/store, or the Mac Pro Support
website at www.apple.com/support/macpro.

56
Chapter 3
Making a Good Thing Better
Installing Serial ATA Hard Disk Drives
Your Mac Pro can accommodate up to four internal 1-inch-high SATA hard disk drives
in the drive bays. If your Mac Pro comes with a single drive installed, it’s in the first drive
bay. You can install drives in the second, third, and fourth drive bays.
To install a hard disk drive:
1
Open your Mac Pro and remove the side panel following the instructions in “Opening
Your Mac Pro” on page 33.
2
Lift the latch to unlock the drive carriers.
Note: When the latch is down, the carriers are locked in the drive bays and can’t
be removed.
3
Pull the carrier out of the drive bay.
Drive carrier
57
Chapter 3
Making a Good Thing Better
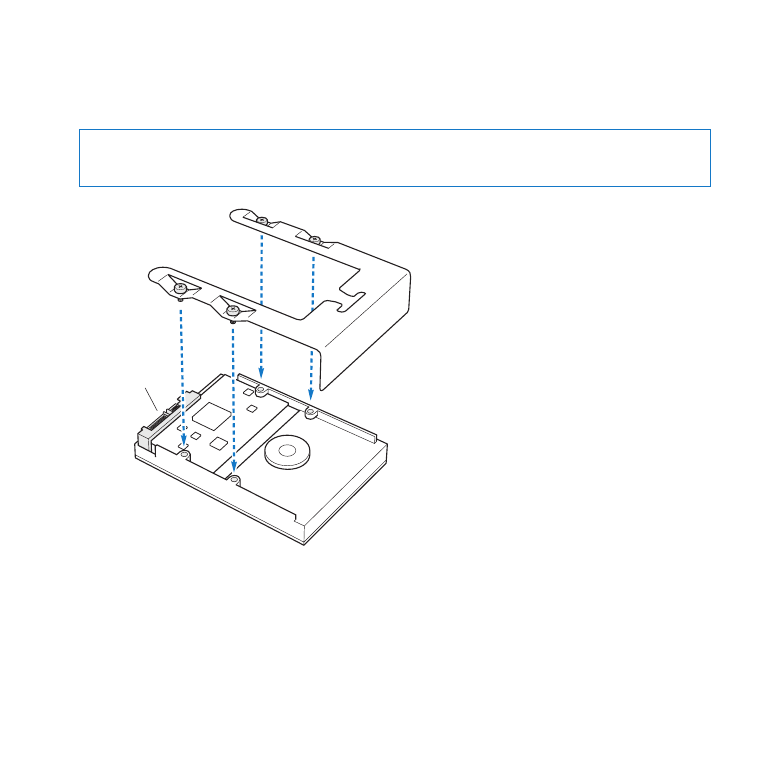
4
Position the carrier over the hard disk drive with the connectors at the back.
5
Use the four screws on the carrier to attach the hard disk drive to the carrier.
NOTICE:
Hold the drive by its sides. To avoid damaging the drive, don’t touch the
printed circuit board.
Connectors
58
Chapter 3
Making a Good Thing Better
6
Lift the latch and slide the carrier over the guides and into the drive bay until it’s
touching the drive connectors and is seated in the bay.
Drive
connectors
7
Replace the side panel, following the instructions starting on page 46.
NOTICE:
Always replace the side panel after installing components. Your Mac Pro
doesn’t operate properly without the side panel in place.
59
Chapter 3
Making a Good Thing Better
Installing a Solid State Drive
Your Mac Pro can accommodate up to four internal 2.5-inch solid state drives in the
drive bays. If your Mac Pro comes with a single drive installed, it’s in the first bay. You
can install drives in the second, third, and fourth drive bays.
To install a solid state drive:
1
Open your Mac Pro and remove the side panel, following the instructions in “Opening
Your Mac Pro” on page 33.
2
Lift the latch to unlock the drive carriers.
Note: When the latch is down, the carriers are locked in the drive bays and can’t
be removed.
3
Pull the carrier out of the drive bay.
Drive carrier
60
Chapter 3
Making a Good Thing Better
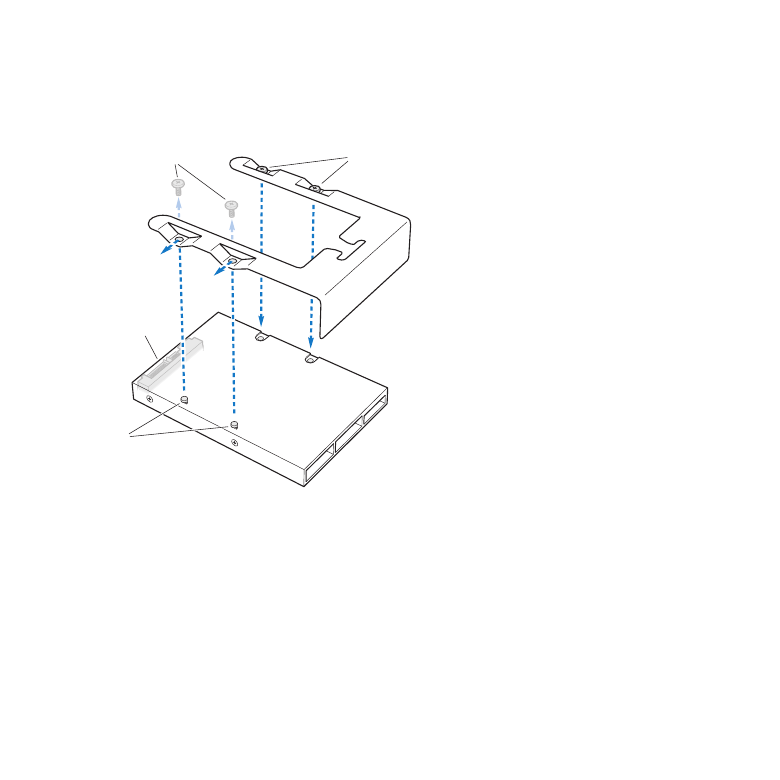
4
Remove the two screws from the drive carrier as shown. You’ll attach the SSD adapter
to the carrier using the two remaining screws. Put the two screws that you removed
away for safekeeping.
Connectors
Hooks
Screws
Unused screws (2)
5
Position the drive carrier over the SSD adapter with the drive connectors at the back as
shown. Insert the two hooks on the top of the adapter into the carrier’s holes. Fasten
the two screws on top of the carrier to attach the SSD enclosure to the carrier.
61
Chapter 3
Making a Good Thing Better
6
Lift the latch and slide the carrier over the guides and into the drive bay until it touches
the drive connectors and is seated in the bay.
Drive
connectors
7
Replace the side panel, following the instructions starting on page 46.
NOTICE:
Always replace the side panel after installing components. Your Mac Pro
doesn’t operate properly without the side panel in place.

62
Chapter 3
Making a Good Thing Better
Replacing an Optical Drive
Your Mac Pro comes with one or two SuperDrives installed in the optical drive bays.
Follow these instructions to replace an optical drive.
Note: Contact your drive manufacturer or consult the manufacturer’s website to
determine if your drive is set to cable select mode. Before you install a drive, set the
drive to cable select mode if the manufacturer hasn’t already done so.
To replace the optical drive:
1
Open your Mac Pro and remove the side panel, following the instructions in “Opening
Your Mac Pro” on page 33.
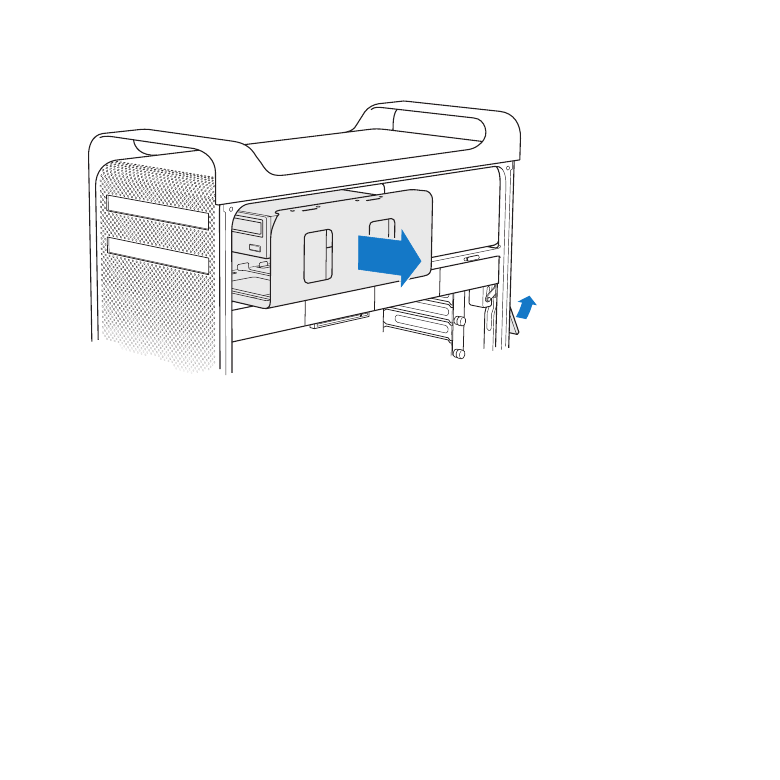
2
Lift the latch to unlock the optical drive carriers.
When the latch is down, the drives and carriers are locked in the optical drive bays and
can’t be removed.
63
Chapter 3
Making a Good Thing Better
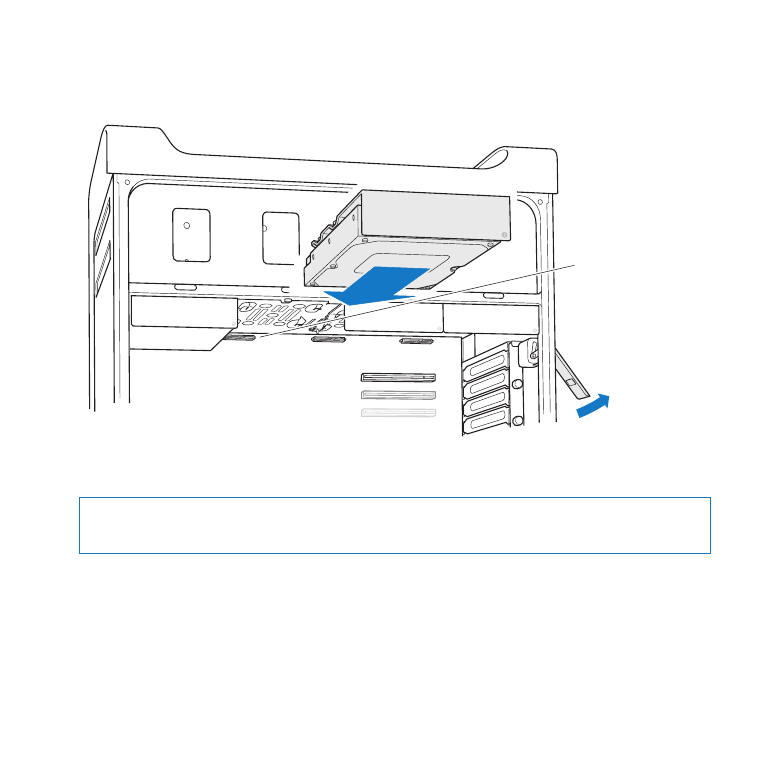
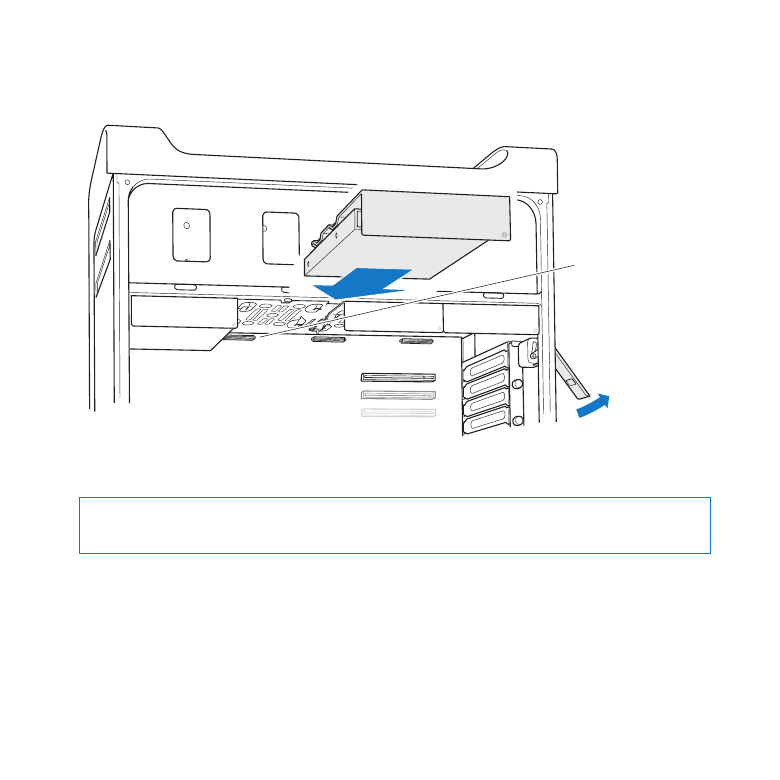
3
Pull the carrier halfway out of the optical drive bay.
64
Chapter 3
Making a Good Thing Better
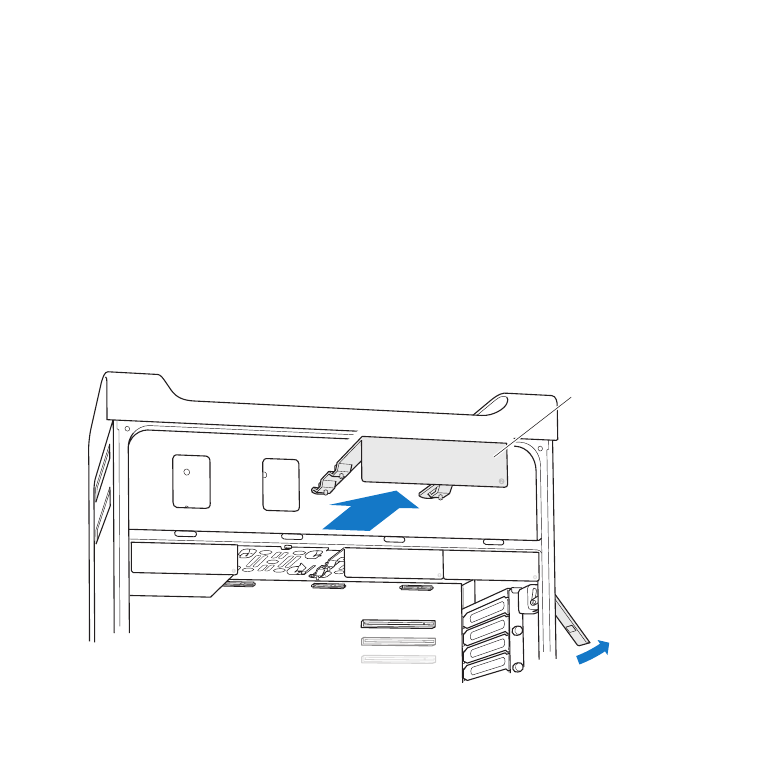
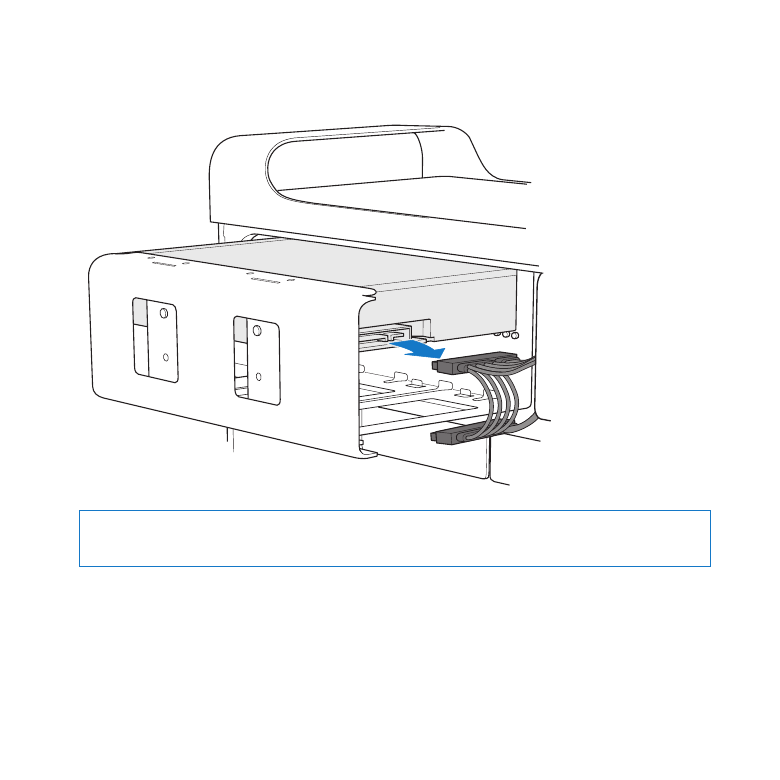
4
Disconnect the cable from the optical drive and remove the carrier from the optical
drive bay.
NOTICE:
When you install or replace optical drives, use the original Apple cables that
came with your Mac Pro.
65
Chapter 3
Making a Good Thing Better
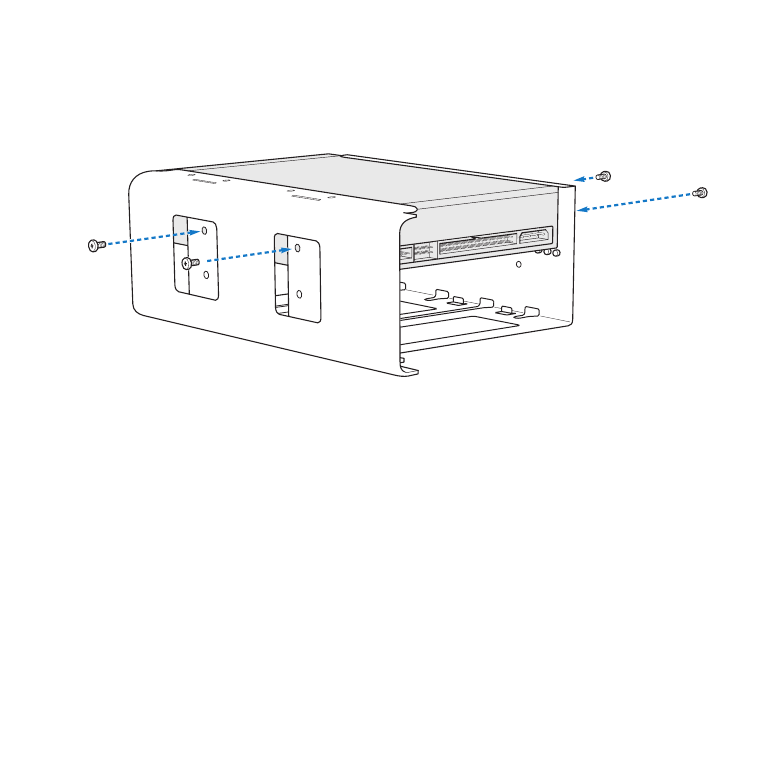
5
Remove the optical drive from the carrier by unscrewing the four attachment screws.
6
Use the four screws from the original optical drive to attach the replacement drive to
the carrier.
66
Chapter 3
Making a Good Thing Better
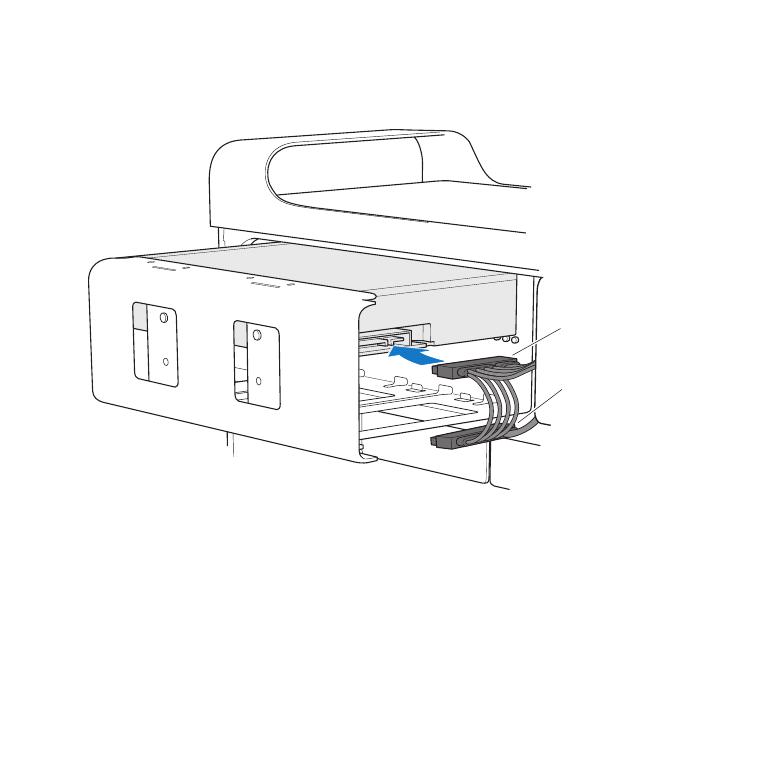
7
Slide the optical drive and carrier over the guides halfway into the optical drive bay.
8
Attach the cable to the back of the optical drive.
Cable middle
connector
Cable end
connector

67
Chapter 3
Making a Good Thing Better
9
Lift the latch and then slide the carrier into the optical drive bay, pushing it into place.
10
Replace the side panel, following the instructions starting on page 46.
NOTICE:
Always replace the side panel after installing components. Your Mac Pro
doesn’t operate properly without the side panel in place.

68
Chapter 3
Making a Good Thing Better