
Adding PCI Express Cards
You can expand the capabilities of your Mac Pro by installing cards in the Peripheral
Component Interconnect (PCI) Express slots. Your Mac Pro has one double-wide PCI
Express graphics slot and three PCI Express expansion slots, for a total of four slots.
These slots accommodate PCI Express graphics cards and expansion cards.
About PCI Express Cards
Your Mac Pro comes with a high-performance PCI Express graphics card, which
contains the graphics processing unit (GPU) and provides the computer’s display ports.
The graphics card is installed in slot 1.
You can install additional PCI Express graphics and expansion cards. Before installing a
card, check its specifications to make sure it can operate in your Mac Pro:
Â
Slots 1 and 2 are x16, PCI Express 2.0 slots
Â
Slots 3 and 4 are x4, PCI Express 2.0 slots
All four slots support 16-lane cards.
NOTICE:
Combined maximum power consumption for all four PCI Express slots must
not exceed 300 watts (W).

69
Chapter 3
Making a Good Thing Better
To install a PCI Express card:
1
Open your Mac Pro and remove the side panel, following the instructions in “Opening
Your Mac Pro” on page 33.
WARNING:
To avoid damaging internal components or the components you want to
install, always turn off and then unplug your Mac Pro. Do not attempt to install items
while it is plugged in. Let your Mac Pro cool down for 5 to 10 minutes before you
touch the internal components, which may be very hot.
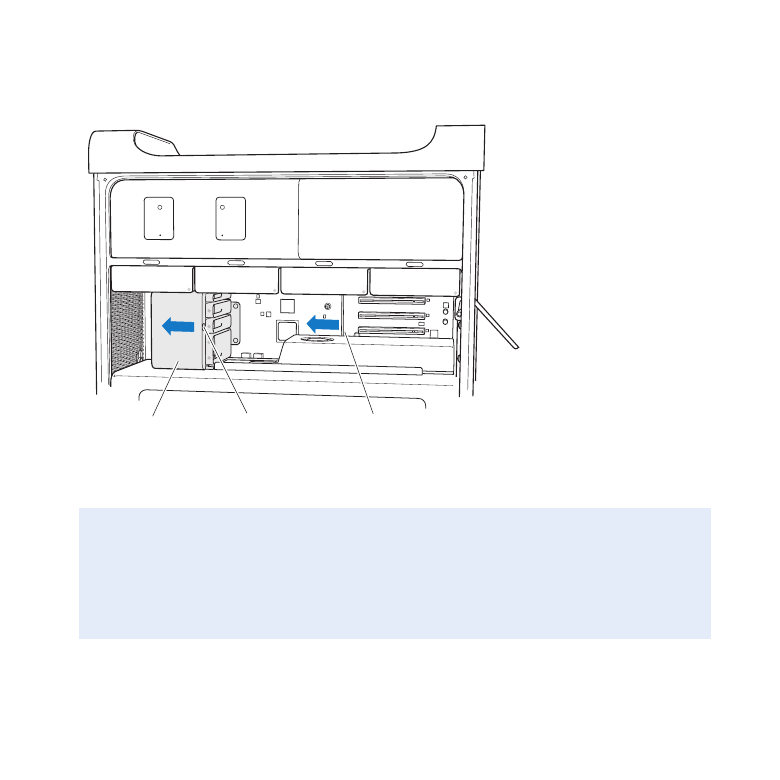
2
Unscrew the captive screws in the PCI bracket and remove the bracket.
Port access cover
PCI bracket
3
Remove the port access cover from the slot in which you plan to install the card.
70
Chapter 3
Making a Good Thing Better
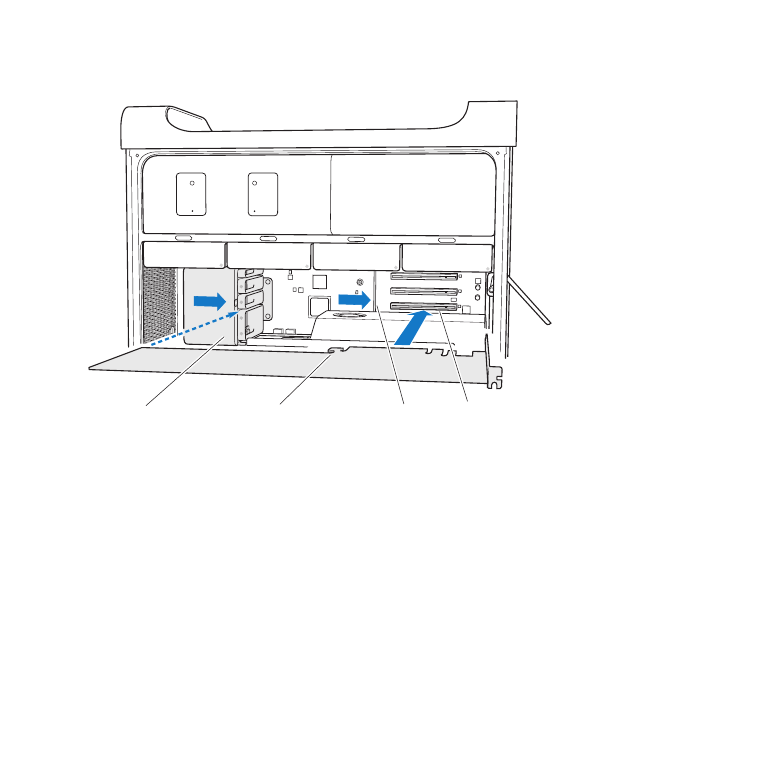
4
Press the button on the PCI slider and move the slider to the left, which moves the
retention bar.
Button
Retention bar
PCI slider
5
Remove your new card from its static-proof bag and hold it by its corners. Don’t touch
the gold connector or the components on the card.
If You’re Installing a Full-Length PCI Card
It may be easier to install a PCI card if you remove the hard disk drives and carriers
(see page 56), and remove adjacent cards. Make sure the end of the card goes in the
appropriate card guide before aligning the card with the PCI slot and completing
the installation.
71
Chapter 3
Making a Good Thing Better
6
Align the card’s connector with the expansion slot and press the card into the slot.
Hook on card
Retention bar
PCI Express slot
PCI slider
7
Press the card gently but firmly until the connector is fully inserted. Press only on the
bare areas of the card to avoid damaging the components. Don’t rock the card from
side to side or force it. If you meet resistance, check the connector and slot for damage
or obstructions, and then try inserting the card again.
8
Pull the card gently to make sure it’s properly connected. If it stays in place and its gold
connectors are barely visible, the card is connected.
9
Move the PCI slider to the right to secure the card.
72
Chapter 3
Making a Good Thing Better
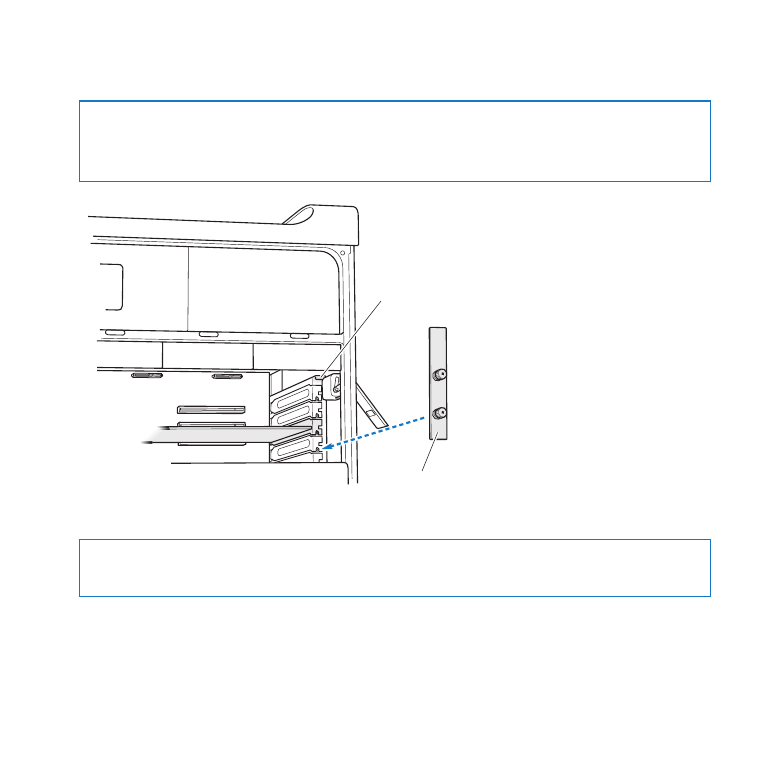
10
Replace the PCI bracket under the brace and tighten the screws to secure the card.
NOTICE:
If you remove a card and don’t install a replacement, place a port access
cover over the empty slot to keep foreign objects out of the enclosure. An uncovered
slot affects the airflow that cools the internal components and may cause damage.
Brace
PCI bracket
11
Replace the side panel, following the instructions starting on page 46.
NOTICE:
Always replace the side panel after installing components. Your Mac Pro
doesn’t operate properly without the side panel in place.

73
Chapter 3
Making a Good Thing Better